Taking a screenshot on your Mac is easier than ever in 2025. Whether you’re using a MacBook, iMac, or Mac Studio, there are multiple ways to capture your screen with speed and precision.
In this complete guide, you’ll learn how to take a screenshot on Mac using different methods—from keyboard shortcuts to built-in apps.
We’ll explain screenshot on MacBook full screen, screenshot clipboard Mac, and even Mac record screen video options.
You’ll also find helpful tips for editing images, setting a timer, and solving issues when screenshot on Mac is not working. Let’s explore the best and fastest ways to grab what’s on your screen.
No matter your macOS version, knowing the right commands can save time and improve your workflow. From casual users to professionals, these tips work for everyone.
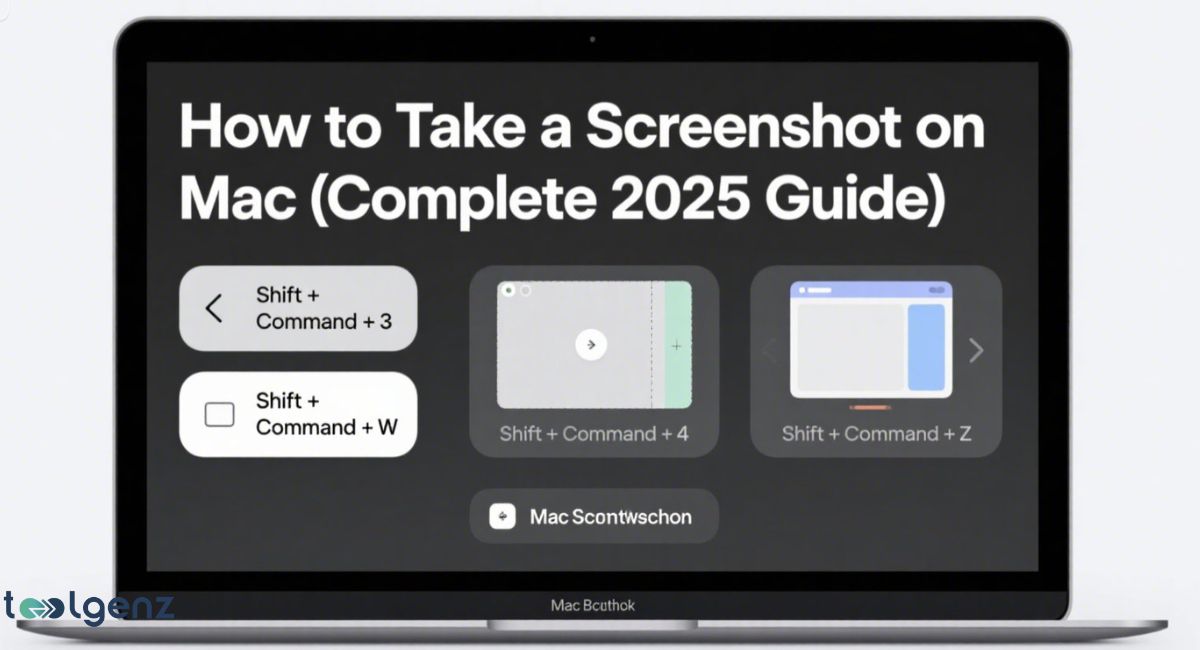
How to Take a Screenshot on Mac
Macs don’t have a Print Screen key like Windows. Instead, Apple uses keyboard combinations to handle screenshots. These Mac screenshot shortcuts are fast and flexible. Once you learn them, capturing content becomes effortless.
You can also use the macOS screenshot app for more control. It lets you take videos, set a screenshot timer on Mac, and change file locations. Everything you capture can be seen in the screenshot preview on Mac before saving it.
If you prefer using tools instead of shortcuts, the Screenshot utility Mac offers a beginner-friendly way to take stills or record your screen. It’s perfect for users who want simple options with clear results.
How to Screenshot the Entire Screen on Mac

The easiest way to get everything on your display is by pressing Shift + Command + 3. This command will take a Screenshot on Mac full screen and save the screenshot to desktop instantly. You’ll also see a thumbnail in the corner for quick edits.
If you want to save Mac screenshot to clipboard, just add the Control key. So the full shortcut becomes Shift + Command + Control + 3. You can then paste the image into documents or emails without saving the file.
This method is great when you need to quickly share visuals without cluttering your desktop. It’s fast, reliable, and works across all modern macOS versions.
How to Capture a Portion of the Screen
To get just a part of your screen, press Shift + Command + 4. Your pointer will change into a crosshair. Use it to select the area you want. This method is best when you need a screenshot part of screen for a specific detail.
To move the selection area while dragging, press the spacebar. Hit Esc to cancel. Want to copy to clipboard instead of saving? Just add the Control key to the shortcut. This gives you more flexibility when working quickly.
It’s especially helpful when you only need a section of a webpage, a graph, or a cropped image for presentations or emails. This shortcut keeps things neat and efficient.
How to Screenshot a Specific Window or Menu
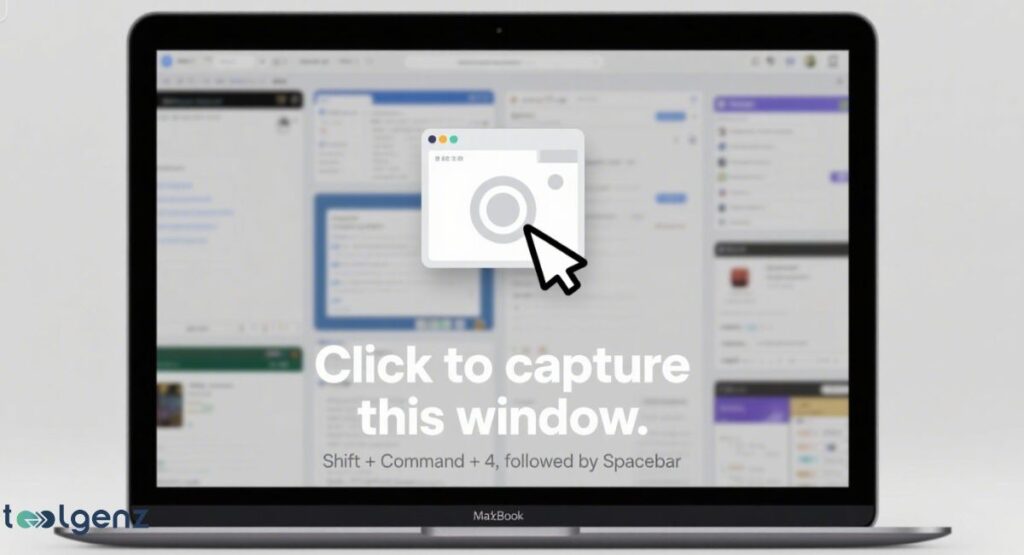
Capturing one window or menu is simple. Press Shift + Command + 4, then hit the spacebar. Your cursor turns into a camera.
Now click the window you want. This creates a screenshot window Mac file that looks clean and sharp.
To screenshot without shadow, hold the Option key while clicking. This is helpful for clean UI captures. Knowing how to capture menu on Mac is useful for developers, writers, and support teams.
You’ll find this method perfect for tutorials or bug reports where you want just one element highlighted. It adds clarity and keeps your screenshots looking professional.
How to Record the Screen on Mac (Video Capture)
You can also record your screen. Press Shift + Command + 5 to open the recording toolbar. Select full screen or a custom area.
Then hit record. This is the easiest way to record screen with QuickTime Mac or use the macOS screenshot app for videos.
If you’re asking, can I record video on Mac screen? The answer is yes. Your Mac already includes all you need. Once done, the video saves to your desktop or selected folder.
This feature is perfect for tutorials, walkthroughs, or capturing live streams. You don’t need extra software, and you can even enable a screenshot timer Mac to prepare before recording starts.
Extra Tools: Screenshot Utilities on Mac
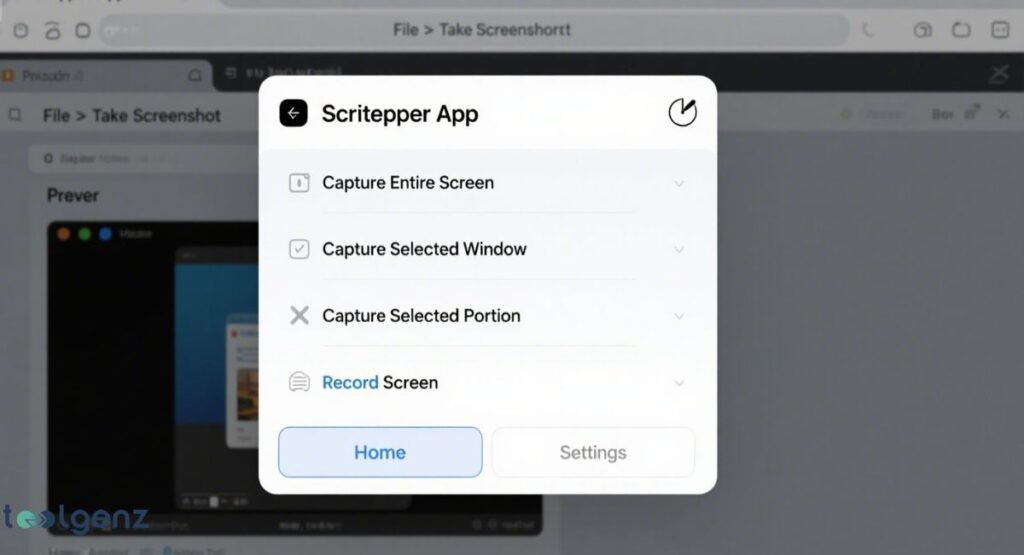
Besides shortcuts, your Mac includes extra tools. The Screenshot utility Mac is found in Applications > Utilities. You can open it using Spotlight too.
It lets you delay screenshots, choose areas, and even edit screenshot after capture on Mac.
Another option is the Preview app screenshots feature. Go to File > Take Screenshot in Preview. Here, you can capture full screen, a portion, or a window. Then edit and save it as different file types.
These built-in tools are user-friendly and don’t require any extra downloads. They’re ideal for users who prefer menus over keyboard shortcuts or want more control over screenshot settings.
Where to Find Your Recording and Screenshot on Mac
By default, your files are saved on the desktop. Their names start with “Screenshot” and include the date and time. This makes them easy to sort. Knowing how to find screenshots on Mac is important if you take many.
If you prefer another folder, you can change it in the screenshot toolbar. This feature came with macOS Mojave screenshot features. It helps you organize files better in your screenshot folder location.
You can even set up a dedicated screenshots folder in your Documents or Downloads. This keeps your desktop clean and lets you quickly locate files during projects or presentations.
Fixing Screenshot Problems on Mac
![A MacBook screen displaying macOS settings for "Privacy & Security." The "Screen Recording" section is open, showing "Allow the apps [sic] by to record the contents of your screen, even while using other apps." Below this, "Apple TV" and "Screenshot" are listed with checkboxes, the "Screenshot" checkbox being checked. An information icon with "Enable permissions or restart Mac" is also visible.](https://toolgenz.com/wp-content/uploads/2025/07/fixing-screenshot-problems-on-mac-1024x555.jpg)
Sometimes things go wrong. You may ask, why is my screenshot on Mac not saving? First, check if you have permissions set under Privacy & Security. You may also want to restart your device.
Some apps block screenshots, like Apple TV. If you see black images, use another app or try third-party software. This is a common screenshot not working Mac fix for many users.
Also, make sure your storage isn’t full and your macOS is up to date. Small issues like these often stop screenshots from saving or appearing where expected.
If the issue persists, check the official Apple Support screenshot page for troubleshooting steps and device compatibility.
Pro Tips for Faster and Better Screenshots
Want better speed? Turn off sound effects. Want clipboard copies only? Add Control to the shortcut. You can even add the screenshot tool to the Touch Bar if supported. This is a cool trick for those who ask how to screenshot with Touch Bar.
You can also change the file format from PNG to JPG using Terminal. If you wonder, how to change screenshot location on Mac, just use the Shift + Command + 5 menu and click “Options.”
These small tweaks improve your workflow. Over time, they help you take clean, organized screenshots faster and with less effort.
Table: Shortcuts keys for Screenshot on Mac (2025 Edition)
| Action | Shortcut | Saved To |
| Full Screen | Shift + Cmd + 3 | Desktop |
| Portion of Screen | Shift + Cmd + 4 | Desktop |
| Specific Window or Menu | Shift + Cmd + 4 + Space | Desktop |
| Full Screen to Clipboard | Shift + Cmd + Ctrl + 3 | Clipboard |
| Portion to Clipboard | Shift + Cmd + Ctrl + 4 | Clipboard |
| Open Screenshot Toolbar | Shift + Cmd + 5 | User Choice |
| Record Screen Video | Shift + Cmd + 5 (Record Option) | Desktop |
| Capture Touch Bar (if available) | Shift + Cmd + 6 | Desktop |
With these tools and tips, you’re now ready to master screenshots on your Mac. Keep practicing, and soon it will feel like second nature. Don’t forget to explore the best way to take screenshot on Mac using all the new tools in 2025!
FAQS
What keyboard shortcut for screenshot on Mac?
Press Shift + Command (⌘) + 3 to capture the full screen, or Shift + Command + 4 to capture a selected area.
How do you take screenshot on Mac?
Use built-in shortcuts like Shift + Command + 3 or open the Screenshot app with Shift + Command + 5 for more options.
How do I get screenshots on a Mac?
By default, screenshot on mac are saved to your desktop with names like “Screenshot [Date] at [Time].”
What keyboard combination for a screenshot?
The most common is Shift + Command + 3 for full screenshot on mac or Shift + Command + 4 for a custom area.
How to screenshot on Apple?
For a screenshot on mac, press Shift + Command + 3 for a full-screenshot on mac or use Shift + Command + 5 to access all tools. If you’re interested in boosting your productivity even more, check out our guide on how to recall an email in Outlook.